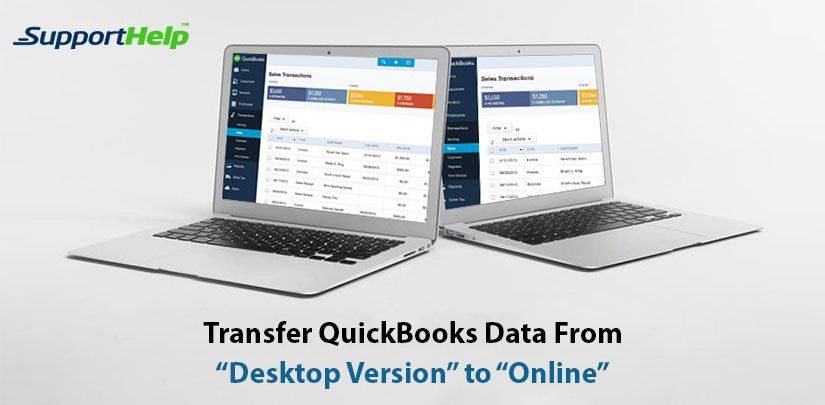
How Do I Transfer Data From Desktop QuickBooks to Online?
Easily Transfer Data file of Desktop QuickBooks to Online Version
It’s possible to transfer date from Desktop QuickBooks to Online with in the first 60 days from your company QuickBooks online start date. The desktop QuickBooks file will replace your whole QuickBooks’ online file and overwrite all the existing content.
You have to be the administrator of both the QuickBooks online account and your existing desktop file. However, your QuickBooks should not exceed 350,000 targets even though the size of the file doesn’t matter.
If you exceed this limit you will be given the option to transfer the balances or the lists. You have to follow these simple steps
First, you have click help and open QuickBooks update, then select all the updates in the up [date now window.
Clink get updates. If all the updates are not downloaded your export company link will not appear. From there you click the file and exit. After this start QuickBooks again and install all the updates when prompted.
To connect to online, you will log in to your QuickBooks online account and agree to the service terms and choose to submit.
The logins screen will automatically appear after you close the product information window. If the login screen fails to appear to repeat the above steps for QuickBooks enterprise.
From there you can pick the online company you intend to transfer your data in to and select ok. There will be notification of “we‘ll email you when we’re done” After completing the import you can now sign in to your online account
Enable ActiveX in Internet Explorer
- Open Internet Explorer (Not necessary that there should be internet connectivity)
- Look for the “Tools” button and then click it, you will see some sub menu displayed on clicking the “Tools” button where you will click “Internet Options.”
- Choose the “Security” option right in the dialog window and select “Internet” button in the Zone pane. Then finalize by clicking the “Custom level” Option.
(If you have you don’t get it please go to the instructions and start the whole process)
- Scrolling, you will see the “ActiveX controls and plugins” option. Please don’t leave without clicking it. (I am happy we are now together).
- Now enable the ActiveX by clicking the “Enable” option. This will allow the ActiveX controls to be downloaded and it will run. Also it will mark the controls safe for scripting.
- Click “OK” button.
- Select “Advanced” button and remove”Do not save encrypted” in the Security section.
- Click the “Apply” button and then click “OK.”
- Close and restart Internet Explorer.
Things to consider and take note of when transferring Desktop QuickBooks to Online.
Intuit seems to have shown its hand during its fourth quarter 2014 report to investors. Company executives noted that QuickBooks Online generates more than $800 in annual revenue per customer, which is a $300 increase over QuickBooks Desktop.
Also, QuickBooks Online is a global platform, meaning the company can target a much larger market in terms of geographical size. Finally, the QuickBooks online platform allows for the easy purchase of additional service solutions for things like payroll.
The online version of QuickBooks is an attractive option. There’s not much attractive about the conversion process, however.
So the actual breakdown of tasks required to transition from the software to the online version may not be as simple or cost-effective as many business users would like. Below are the important factors to considered when transferring Desktop QuickBooks to online;
- Size of the file: Uploading file of size more than 200MB, you need to condense this to a small file. This can be done by compressing. It is more easier to upload files of more than 200MB size when using the QuickBooks 2010 upto the latest.
- Reporting: Since the QuickBooks online does have many defaults reports, it is good that these reports should be added to a group and mailed at a schedule to anyone who will wish to access at any time or any day.
- Budget: In QuickBooks Desktop, budgets cannot be converted at all unlike when you are using QuickBooks online where anyone can create multiple budgets.
- Lists: There are two types of lists in QuickBooks. Which are Custom Fields List and the customer message list. The custom fields on list works best on QuickBooks Online because it can allow up to 3 custom fields to be added and converted whereas QuickBooks desktop cannot convert files. For the message List, every user must know that messages are added manually.
- Reconciliations- Every user must know that before files are transferred from desktop to online, it is important to note that reconciliation must be completed because they will get lost and cannot be found after the conversion.
- Permissions: Files that had been protected on a QuickBooks desktop will not have the same protection. The credentials will not be converted and once they have been transferred online, users will have to sign up for the new logins.
- Invoices: Invoices must be converted except the pending ones. Users are advised to clear the pending invoices before the conversion is done
Step by Step guide on How to transfer desktop QuickBooks to Online.
Here are the steps to convert QuickBooks Desktop to Online:
Copy the QuickBooks Company File
But if your software is not working properly, then you do need help with your Quicken desktop. But solving these issues is not for everyone. You require expert help in such situations. An expert can help you in the following ways: –
- Launch the QuickBooks desktop program.
- Press “F2” on your computer keyboard to open the Product Information window. Write down or copy the name and directory location of your company file displayed in the File Information section of the window.
- Open the company file in QuickBooks. If prompted, enter your administrator password.
- Click “File,” “Utilities” or “Maintenance” and then “Copy Company File for QuickBooks Online.”
- Enter a name for the file and select a directory location on your computer. Remember the directory location, because you will need this information to import the file into QuickBooks Online.
Connect to QuickBooks Online
- Log in to your QuickBooks Online account. Agree to the Terms of Service.
- Click the “Company” tab in the main menu and then select “Import QuickBooks Desktop Data” from the drop-down menu.
- Go to the location of the company file you saved earlier. Once you get it, open it by clicking the “Open” button.
- Follow the steps in the onscreen import interview window that launches automatically. During this process, you will need to enter basic information about your company, such as contact information and bank details.
- Wait for around 24 hours for QuickBooks to complete the import process. You will receive an email when the process is complete
Benefits of Converting from QuickBooks Desktop to QuickBooks Online
Here are just a few of the benefits if you import data to QuickBooks Online as opposed to starting from scratch:
- Ability to Run Comparison Reports
Whether you’ve been in business for 12 months or a few years, one of the advantages to having access to historical data is that you can run reports to compare the current year to previous years.
- Start with a Clean Slate
Let’s say that your existing QuickBooks file has seen more than it’s share of bookkeepers who didn’t do such a great job of managing your books. You can export your customer, vendor and products & services lists from QuickBooks Desktop, provided the information is still reliable, and import these lists into QuickBooks Online.
What to Do After Your Data Has Been Imported
Before you begin working in QuickBooks Online, you need to verify that your data was successfully imported. The best way to do this is to run
All the business applications on the two QuickBooks (QBO and the QBDT) for the purpose of comparing the totals. These applications are the Balance sheets, and the Profit & Loss statements. If you find a discrepancy when comparing your reports, contact Intuit at 1-800-638-8615 and they will troubleshoot the issue at no cost to you!
Conclusion
Once you transfer files from QuickBooks desktop to QuickBooks online, you are given 60 days to do anything to it. You can do anything to it during the 60 days, you can upload it over and over again. The company file must be smaller than 150MB to import correctly. You can view the file size in the Product Information window. If the file is larger than 150MB, you can import separate lists of transactions from the desktop version to the online version of QuickBooks.
It is now cleared that QuickBooks online is of great advantage in a company It is easy to install and can handle many tasks which the QuickBooks online could not have done.
Revisit a section
- Easily Transfer Data file of Desktop QuickBooks to Online Version
- Enable ActiveX in Internet Explorer
- Things to consider and take note of when transferring Desktop QuickBooks to Online.
- Step by Step guide on How to transfer desktop QuickBooks to Online.
- Copy the QuickBooks Company File
- Connect to QuickBooks Online
- Benefits of Converting from QuickBooks Desktop to QuickBooks Online
- What to Do After Your Data Has Been Imported
- Conclusion
Related Articles
